“CMS Help” Documentation by the “GenieCloud” Team v1.0
Thank you for using the GenieCloud CMS System. If you have any questions that are beyond the scope of this help file, please feel free to email info@geniecloud.co.uk. Thank you!
Table of Contents
- Logging In
- Your Admin Panel
- Pages and Content
- Slideshow (where applicable)
- Adding Images (to content)
- Adding Images (to gallery)
- News and Blogs
- Footer Area
- Common Problems
1. Logging In - top
1) Open your web browser and navigate to:
http://www.YOURDOMAIN.co.uk/admin(replace YOURDOMAIN with your actual domain name).
2) Your username will be admin and your password sent in your welcome email.
3) Once you have entered your details, please click 'Submit'.
2. Your Admin Panel - top
1) Your admin panel is the headquarters for your website, everything here controls what is seen on your website, so be sure to understand what everything means, if you're unsure please contact us :
info@geniecloud.co.uk
2) Main Menu
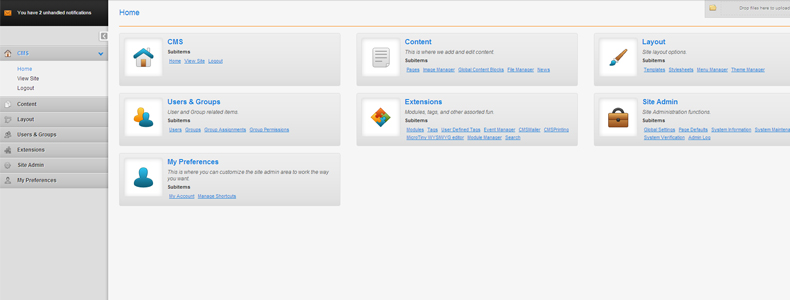 This is the main menu, from here you can access every part of your site and control how the site appears and functions. The main sections here are Pages, Image Manager, Slideshow/Gallery and News.
3. Pages and Content - top
1) We have setup some sample pages ready for you to start editing, to view your pages click Pages on the left hand menu.
This will take you to a new page where the pages on your website are laid out.
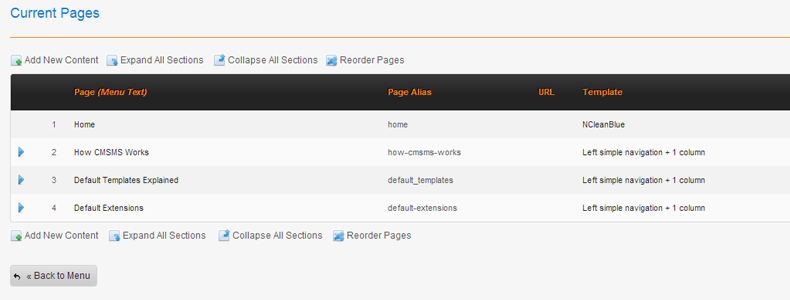
2) In the image above, you can see some sample pages, the only part we are concerned with are Page (Menu Text) and Template.
The Page name (Menu Text) is what appears in the main menu on your website, hence the names 'Home, About us, Contact Us' in the above example.
3) To edit your home page, click on Home this will open up the content editor for the Home page.
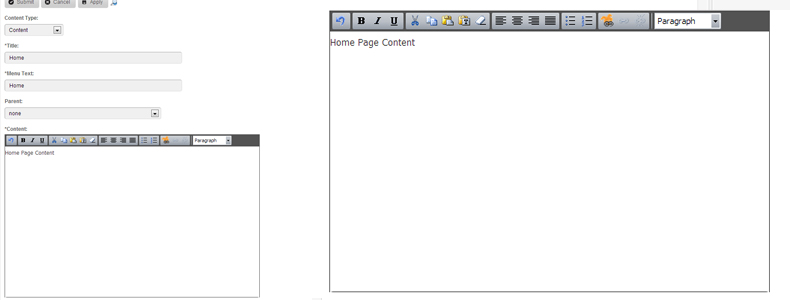
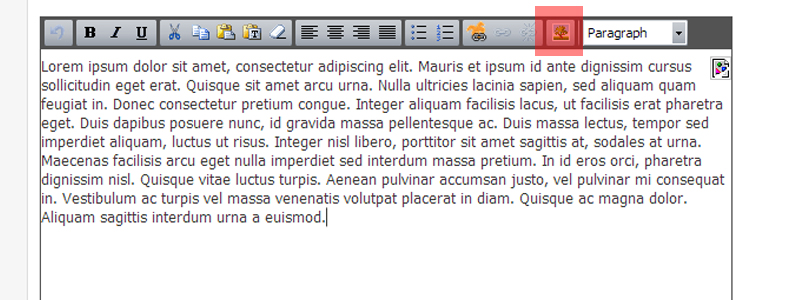
4) In the above image, this is the standard Content editor, its a WYSIWYG editor, so, what you see is what you get, although text has been pre-styled to suit the design and style of the site, should you wish to have full control please contact us.
5) The content boxes are labelled to represent where the content is on the site, ie. Page Heading would represent the main page title
PLEASE NOTE - THE 1st CONTENT BLOCK LABELLED CONTENT IS THE MAIN PAGE TITLE FOR THE WINDOW - NOT THE PAGE ITSELF
6) Please edit the text as you see fit, once completed and you are happy with the editing, click Submit to save the changes.
7) To add a new page, return to the Pages menu and click Add New Content this will open up a plain content page.
8) The main part here is choosing which template to use, 90% of the time a template called Full Width Plain will suffice. To choose this, click Options from the top right of the page and select the template from the drop down menu, this will return you to the content editing page.
9) Fill in the content as you see fit, remember, the default content block is the PAGE TITLE not the PAGE HEADING.
10) Save your alterations by clicking Submit.
11) To add a new page, please click Add New Content.
12) Title = Name of the Page.
Menu Text = Name of page as it appears in the menu.
Parent = Select this to make the page a sub menu item.
13) To add a template to the page, more than likely a Information Page please click the Options button on the top right of the page.
14) The most common template is called Full Width Plain. This is a plain page with 1 big content block, where you can add images and content and style them using the image alignment options when adding an image to the content block. To return to the previous page, please click Main from the top right.
4. Slideshow (where applicable) - top
1) Your slideshow (if you have one) will be the home page sliding images, this is easily controlled via the slideshow menu item on the left of the main CMS page.
2) To alter/add images to your slideshow, please click slideshow from the menu, then choose Edit Slides.

3) In the image above you will see the slideshow interace, to add an image please click Add Pictures.
4) From this new screen, please click Upload and select the images you wish to add, the default size here is 940 x 355 this is the optimal size so the images will display correctly
5) Once uploaded please click Save this will add the image and display it on your slideshow.
5. Adding images (to content) - top
1) Go to Menu -> Content -> Image Manager and upload some images, images you'll want on the site.
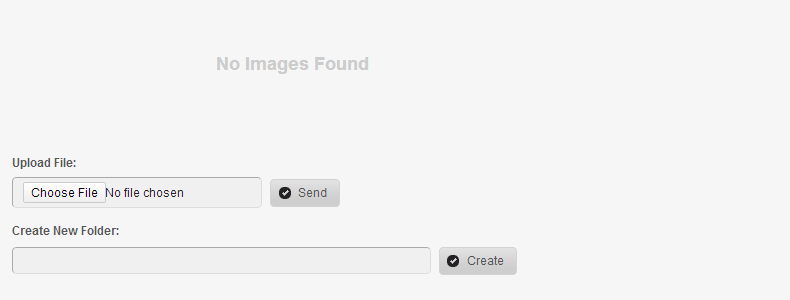
2) Once uploaded the files can be added easily into content blocks but using the Add image button from the content block in the pages interface. See image below.
3) Save your content as normal
4) For those using static image blocks, there is a drop down menu at the bottom of the page, select the image from here (this is dependant on your site, if you do not have this, please do not worry and add images following the above) For those using static blocks, please upload an image using the Image Manager as normal, and select the image from the drop down menu in the content block as described above.
6. Adding images (to gallery) - top
1) Go to Menu -> Content -> Gallery
2) Select the gallery, most commonly there will only be 1 gallery called Gallery. So click this to enter the gallery.
3) To add image, simply choose Add Images. You can add multiple images by selecting than one (whilst holding the CTRL Key on your keyboard select multiple images).
4) Once selected, click Open and this will upload the images to the gallery. Its setup in such a fashion that it will resize and or crop the images for you. Once completed you will see a notice telling you that the images were uploaded, to save the changes, please click Save.
7. News and Blogs - top
1) If you have a news module or blog option, you can add/edit/remove posts and news easily, navigate to
Menu -> Content -> News
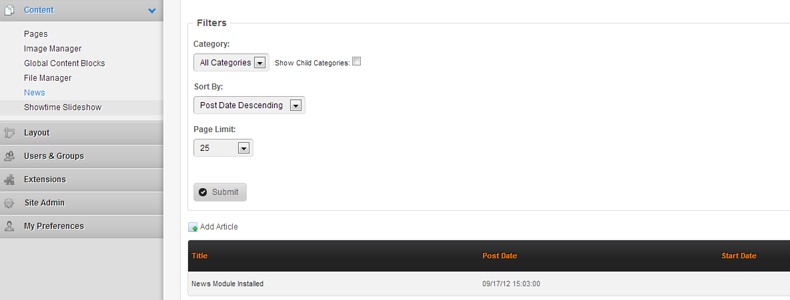
2) To add a new post, click Add Article and fill out all of the parts you see fit with your news or blog item.
3) Once completed, please click Save. This will post the blog/news item on the site, already styled and ready for visitors to see.
8. Editing your Footer - top
1) You may have noticed you have a footer which is the same throughout your whole site, this is easy to change and it involves editing one file. To edit please navigate to
Menu -> Content -> Global Content Blocks
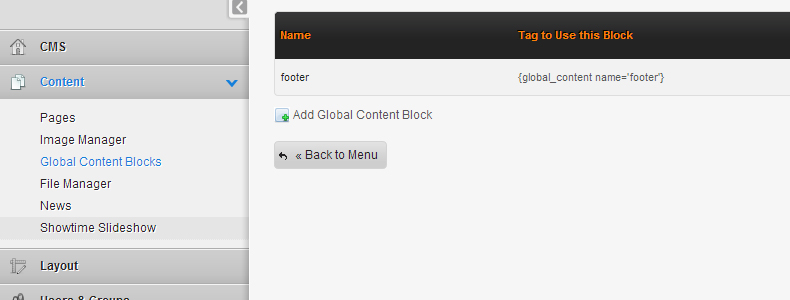
2) To edit the footer global content block, click footer from the list and you will see your Footer either as code, or text. To edit as text, please make sure that WYSIWYG is checked on.
3) Once completed, please click Save. This will post save the changes on the site, already styled and ready for visitors to see and will be visible throughout the site.
9. Common Problems - top
1) Q. Why cant i change the font? A. The fonts are set globally throughout the site using CSS styles. To alter fonts please contact us and we can make some adjustments, fonts are matched for the site through style and design.
2) Q. Why are my images stretched?
A. Your images are more than likely to be the wrong size for where you are putting them, most slideshows or home page sliders are 940pixels wide and 350pixels high, if you are unsure please contact us.
3) Q. I cannot login.
A. Please refer to the email you got confirming your site is live and your password, if this still doesnt work, please contact us.
Once again, thank you very much for using GenieCloud. If you have a more general question relating to the CMS, you might consider contacting us info@geniecloud.co.uk.
Geniecloud Team